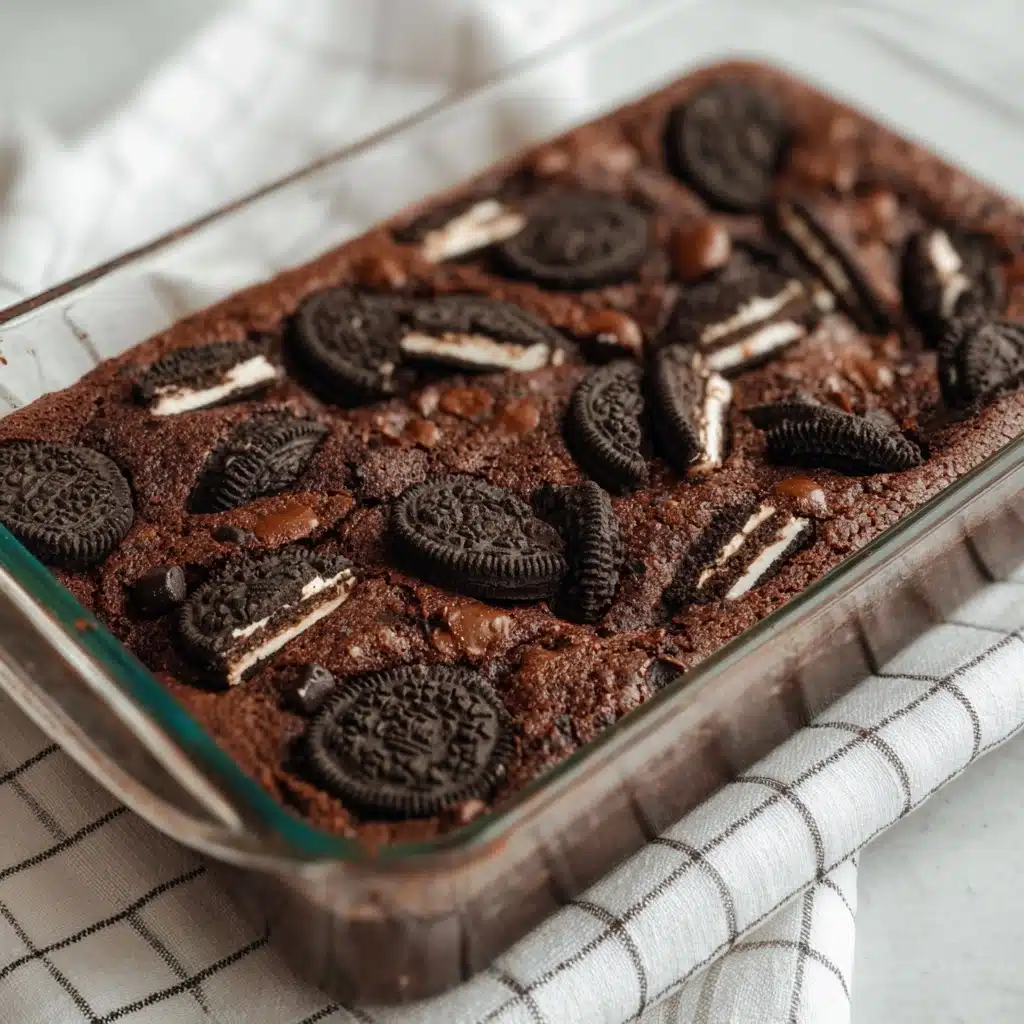
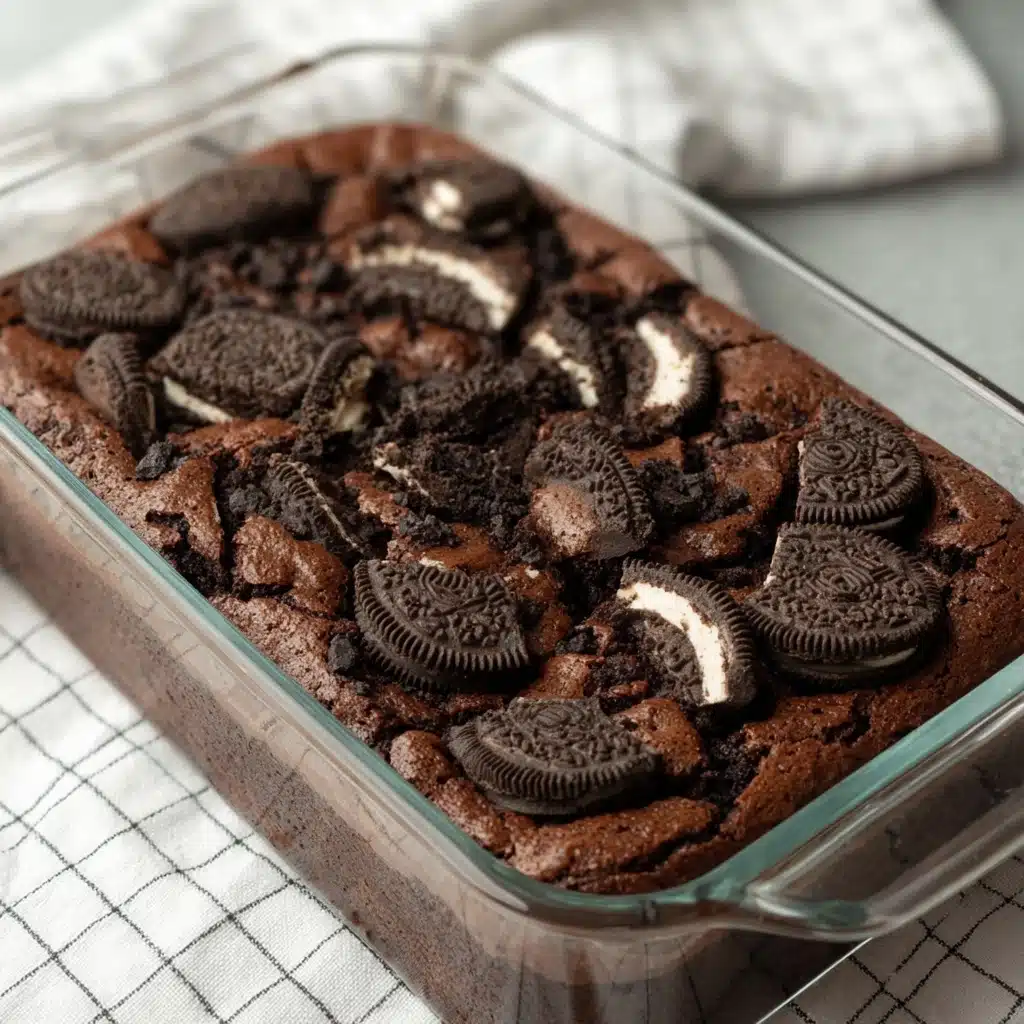
Oreo Dump Cake Recipe
If you have a sweet tooth and love easy-to-make desserts that feel like a warm hug, you’re going to adore this Oreo Dump Cake Recipe. It’s a luscious, no-fuss treat that layers beloved Oreo cookies with smooth sweetened condensed milk, fluffy Cool Whip, rich chocolate cake mix, and buttery goodness in one pan. The magic happens as it bakes into a gooey, crunchy, chocolatey masterpiece that’s perfect for any occasion. Trust me when I say, this dessert has a way of disappearing fast, so you’ll want to have all your ingredients ready for this crowd-pleaser!
Ingredients You’ll Need
This Oreo Dump Cake Recipe calls for surprisingly simple ingredients, each playing a special role to create the perfect blend of flavors and textures. From the crunch of Oreos to the silky layers of whipped topping, every component is essential.
- Oreo cookies: Use 20 classic Oreo cookies to provide a crunchy and chocolaty base that contrasts beautifully with the creamy layers.
- Sweetened condensed milk: One 14-ounce can adds smooth sweetness that soaks into the Oreos, giving the cake its moist, indulgent texture.
- Cool Whip: 8 ounces, thawed, offers a light and fluffy creaminess that balances the dense chocolate cake mix.
- Chocolate cake mix: One box creates the rich, cakey topping that crisps up during baking for added texture and chocolate flavor.
- Butter: ¾ cup (12 tablespoons), sliced into pats; butter melts over the cake mix for a golden, irresistible crust.
How to Make Oreo Dump Cake Recipe
Step 1: Prep Your Oven and Pan
Start by preheating your oven to 350°F (175°C). While it warms up, lightly grease a 9X13-inch baking dish with butter or a non-stick spray. This step ensures your cake won’t stick and helps achieve an even bake with a sticky, fudgy bottom.
Step 2: Layer the Oreos
Place two layers of ten Oreo cookies each side-by-side in the baking dish, creating a solid Oreo foundation. These cookies give the dessert its unmistakable crunch and familiar chocolate cream flavor that everyone loves.
Step 3: Pour the Sweetened Condensed Milk
Evenly pour the entire 14-ounce can of sweetened condensed milk over the Oreos. This liquid sweetens the cake and seeps down, soaking into the cookies to create a wonderfully moist texture.
Step 4: Spread the Cool Whip
Gently spread the thawed 8 ounces of Cool Whip over the sweetened condensed milk layer with a spatula. This adds a light, fluffy cream layer that cuts through the richness, making every bite dreamy and soft.
Step 5: Add the Cake Mix
Sprinkle the entire box of chocolate cake mix evenly over the Cool Whip layer. Use a fork to break up any lumps and rake it across the surface to cover all areas. This dry layer will become the crunchy, cakey topping once baked.
Step 6: Top with Butter
Slice the ¾ cup of butter into tablespoon-sized pats and distribute them evenly across the top of the cake mix layer. The melting butter creates those golden crispy pockets that make the texture so addictive. Remember, do not stir or mix—this is what gives the “dump cake” its signature effect.
Step 7: Bake to Perfection
Bake in the oven at 350°F for 40 to 45 minutes. You want the edges bubbling and the top golden brown. Once done, allow it to cool slightly so it sets just enough to serve easily without losing its gooey charm.
How to Serve Oreo Dump Cake Recipe
Garnishes
This Oreo Dump Cake is stunning on its own, but if you want to kick it up a notch, try topping with a dollop of whipped cream, a sprinkle of crushed Oreos, or even a drizzle of chocolate or caramel sauce. A few fresh berries can also add a lovely pop of color and brightness.
Side Dishes
Pair it with a scoop of vanilla ice cream for a classic combo or serve alongside coffee or milk to balance out the rich sweetness. For something different, a simple glass of cold almond milk or a cup of hot espresso brings out the chocolate tones beautifully.
Creative Ways to Present
If you’re serving at a party, consider scooping the cake into individual dessert cups or mason jars for easy handling and adorable presentation. Layer additional whipped cream and cookie crumbs on top for a parfait-style treat that looks as fabulous as it tastes.
Make Ahead and Storage
Storing Leftovers
This Oreo Dump Cake keeps wonderfully in the fridge for up to 4 days. Simply cover it tightly with plastic wrap or a lid to maintain freshness and prevent it from drying out. The flavors even meld together more after resting overnight.
Freezing
You can freeze leftover cake by wrapping it well in plastic wrap followed by foil, or by transferring it to an airtight container. Freeze for up to 2 months. When ready to eat, thaw overnight in the refrigerator for best texture.
Reheating
To revive warm, gooey goodness, reheat individual portions in the microwave for 20-30 seconds. For larger portions, use a 300°F oven for about 10-15 minutes until warmed through, keeping the delicious crisp top intact.
FAQs
Can I use a different type of cookie instead of Oreos?
Absolutely! While Oreos give that iconic taste and texture, you could experiment with other sandwich cookies or even chocolate chip cookies for a different twist.
Is it necessary to thaw the Cool Whip before using?
Yes, thawing Cool Whip for about 15 minutes makes it easier to spread evenly and prevents clumps, which ensures a smoother texture in the final cake.
Can I make this dish dairy-free?
With some substitutions like dairy-free Cool Whip and margarine instead of butter, you can make this Oreo Dump Cake Recipe dairy-free. Just be sure to check ingredients on your cake mix and Oreos, as some may contain dairy.
What if I want a less sweet version?
You can slightly reduce the sweetened condensed milk quantity or use a sugar-free cake mix to tone down the sweetness without losing the rich, creamy texture that makes this cake so special.
Can this recipe be doubled for a larger crowd?
Since this recipe fills a 9×13 pan perfectly, you can prepare two pans for larger gatherings, but doubling directly in one larger pan may affect baking time and texture, so it’s best to stick to standard pan sizes.
Final Thoughts
This Oreo Dump Cake Recipe is a total winner when you want an easy, crowd-pleasing dessert that feels homemade but requires minimal effort. Once you try it, I bet it will become your go-to for potlucks, family dinners, or just treating yourself to a little happiness. So gather your ingredients, follow these simple steps, and get ready to enjoy a slice of chocolatey, creamy delight that’s truly unforgettable!
PrintOreo Dump Cake Recipe

This Oreo Dump Cake is a delightfully easy-to-make dessert layered with Oreo cookies, sweetened condensed milk, Cool Whip, chocolate cake mix, and butter. Perfectly baked to create a rich, creamy, and chocolaty treat that’s sure to satisfy any sweet tooth with minimal effort.
- Prep Time: 10 minutes
- Cook Time: 45 minutes
- Total Time: 55 minutes
- Yield: 12 servings 1x
- Category: Dessert
- Method: Baking
- Cuisine: American
- Diet: Vegetarian
Ingredients
Cookies
- 20 Oreo cookies
Dairy & Cream
- 14 ounces sweetened condensed milk (1 14-ounce can)
- 1 8-ounce container Cool Whip, thawed for about 15 minutes
- ¾ cup butter (1 ½ sticks or 12 tablespoons), cut into 12 pats or smaller
Dry
- 1 box chocolate cake mix
Instructions
- Prep: Preheat your oven to 350°F (175°C) and lightly grease a 9×13-inch baking dish with butter or non-stick cooking spray to prevent sticking.
- Assemble Oreo Layer: Place two layers of 10 Oreo cookies each evenly across the bottom of the prepared baking dish, arranging them to cover the surface.
- Add Sweetened Condensed Milk: Pour the entire 14 ounces of sweetened condensed milk evenly over the Oreo cookies, ensuring thorough coverage.
- Spread Cool Whip: Using a spatula, spread the 8 ounces of thawed Cool Whip evenly over the layer of sweetened condensed milk to create a creamy layer.
- Sprinkle Cake Mix: Evenly sprinkle the entire box of chocolate cake mix over the Cool Whip layer. Use a fork to gently rake and break up any lumps for an even distribution.
- Add Butter: Cut the ¾ cup butter into 1 tablespoon slices or smaller and place them evenly across the surface of the cake mix, covering as much area as possible. Do not mix the butter in.
- Bake: Bake the cake in the preheated oven at 350°F (175°C) for 40 to 45 minutes, or until the top is bubbly and golden brown.
- Cool and Serve: Remove the cake from the oven and allow it to cool slightly before serving to let the layers set and flavors meld.
Notes
- Ensure the Cool Whip is thawed but still cold for easier spreading.
- Do not stir or mix ingredients once layered; this keeps the distinct layers for texture contrast.
- Use a sharp knife to slice the cake once cooled for clean servings.
- Store leftovers in the refrigerator covered tightly; consume within 3-4 days.
- You can substitute the chocolate cake mix with any other flavor for variation.
- For a gluten-free version, use gluten-free chocolate cake mix and gluten-free Oreos.
Nutrition
- Serving Size: 1 piece (approximately 1/12 of recipe)
- Calories: 360
- Sugar: 28g
- Sodium: 320mg
- Fat: 20g
- Saturated Fat: 11g
- Unsaturated Fat: 7g
- Trans Fat: 0.5g
- Carbohydrates: 44g
- Fiber: 2g
- Protein: 4g
- Cholesterol: 40mg
Keywords: Oreo dump cake, easy dessert, layered cake, no-mixer dessert, Oreo dessert, chocolate cake dessert