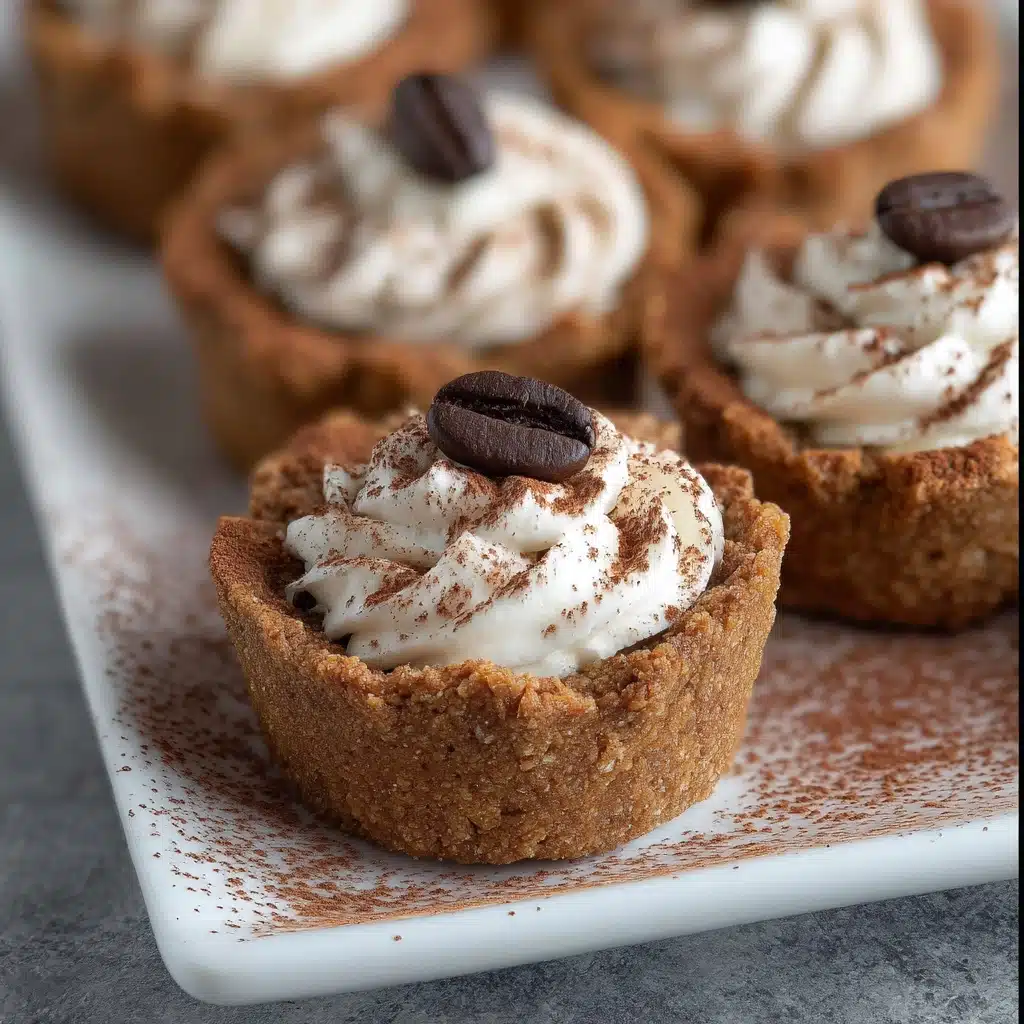
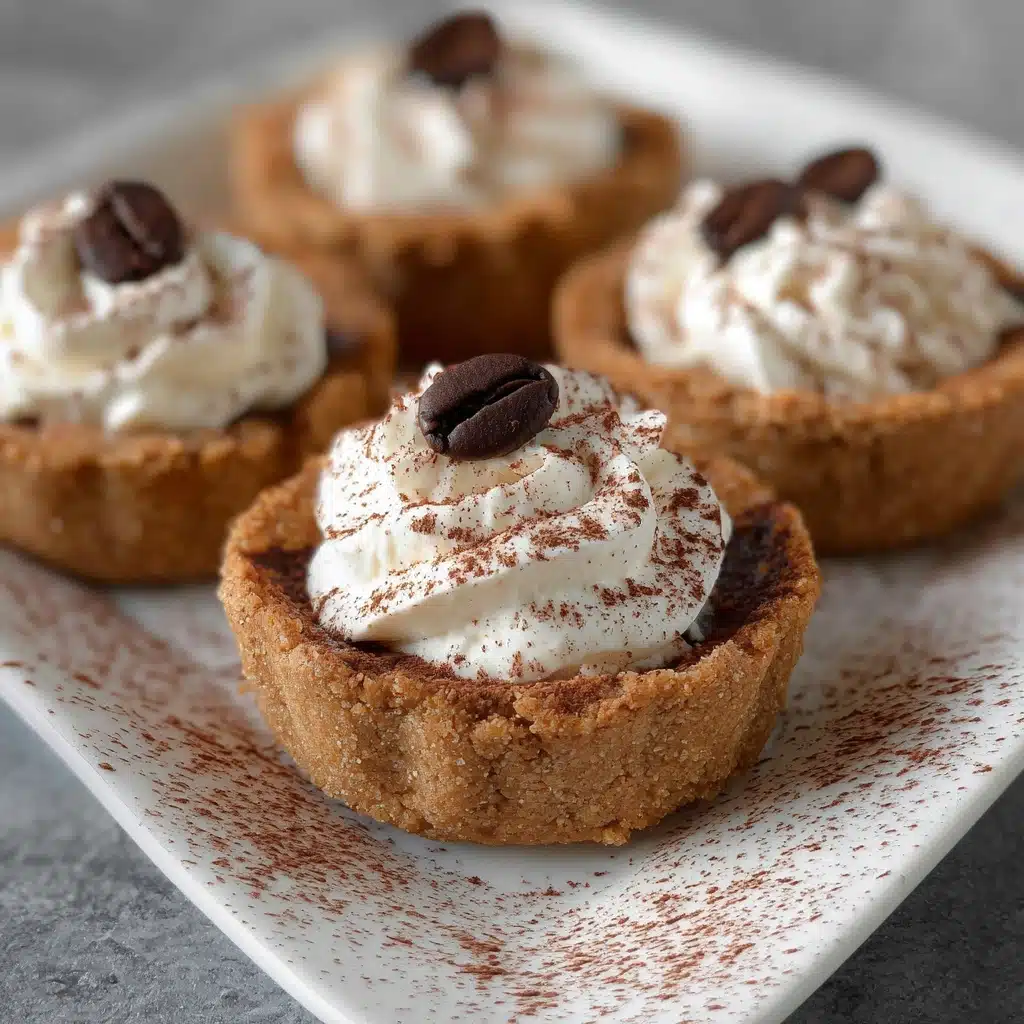
Tiramisu Cookie Cups Recipe
If you adore the classic Italian dessert but want a fun, portable twist, the Tiramisu Cookie Cups Recipe is a dream come true. These little treats capture all the luscious flavors and creamy textures of tiramisu in an easy-to-handle cookie cup form that’s perfect for sharing, parties, or just treating yourself. Combining a crunchy chocolate cookie base with rich coffee-chocolate pudding and smooth mascarpone cream, each bite offers a symphony of tastes that is both indulgent and utterly irresistible.
Ingredients You’ll Need
To create the magic of this dessert, you’ll rely on some straightforward but essential ingredients that each play a vital role in flavor, texture, and appearance. From the crunchy chocolate cookie base to the silky mascarpone cream, every element is thoughtfully chosen for the perfect tiramisu experience.
- Chocolate cookies: Using crushed Oreos or similar chocolate cookies provides the crisp, chocolaty foundation that supports the creamy layers.
- Unsalted butter: Melting and mixing butter into the cookie crumbs helps bind the base together with a rich, buttery flavor.
- Espresso: Brewing a strong coffee adds the essential boldness and authentic tiramisu coffee kick.
- Coffee liqueur (optional): This boosts the coffee depth and adds a subtle boozy warmth, but you can skip it for a family-friendly treat.
- Semi-sweet chocolate chips: They melt into a smooth chocolate layer that perfectly balances the coffee’s bitterness.
- Heavy cream: Used in both the chocolate pudding and the mascarpone cream, it creates that decadent, velvety mouthfeel.
- Cornstarch: Adding structure to the coffee-chocolate pudding, ensuring it sets just right without being runny.
- Mascarpone cheese: This creamy, rich cheese is the heart of tiramisu’s signature luxurious texture.
- Powdered sugar: Sweetens the mascarpone cream gently without graininess.
- Vanilla extract: Offers a subtle fragrance and enhances the sweetness of the cream layer.
- Unsweetened cocoa powder: Dust the top for that classic tiramisu finish and a slight chocolate bitterness.
- Chocolate shavings or mini chocolate chips (optional): Add them as garnishes to elevate the presentation and add an extra chocolate dimension.
How to Make Tiramisu Cookie Cups Recipe
Step 1: Create the Cookie Base
Start by preheating your oven and lining a muffin tin with cupcake liners. The cookie base sets the stage, so mixing crushed chocolate cookies with melted butter until the texture resembles wet sand will ensure a firm and crunchy base. Press the mixture tightly into the liners and briefly bake them. This step crisps up the base while binding everything together, so it won’t crumble when filled.
Step 2: Prepare the Coffee-Chocolate Layer
This luscious middle layer brings together strong espresso, optional coffee liqueur, melted chocolate chips, and butter. Melting these over low heat creates a smooth blend. Meanwhile, whisk heavy cream with cornstarch separately; adding it back to the saucepan over medium heat thickens the mixture to a pudding-like consistency. Cooling this to room temperature readies it for layering and ensures a silky texture that perfectly offsets the cheesecake-style mascarpone on top.
Step 3: Whip the Mascarpone Cream
Whip mascarpone cheese with powdered sugar and vanilla until smooth and creamy. Separately, beat cold heavy cream until it forms stiff peaks, then gently fold it into the mascarpone mixture. This folding technique keeps the airiness intact so your cream will remain light and fluffy, creating the indulgent, melt-in-your-mouth layer classic to tiramisu.
Step 4: Assemble the Tiramisu Cookie Cups Recipe
Now comes the most exciting part: layering! Add alternating spoonfuls of mascarpone cream and coffee-chocolate pudding onto the cookie base in each liner. Use a gentle smoothing motion and chill the cups for about 10 minutes between layers. This chilling step is key for maintaining beautiful, distinct layers and a stable structure that won’t collapse when served.
Step 5: Finish With Cocoa Powder
Sift a generous layer of unsweetened cocoa powder on top of each cup to complete the classic tiramisu look along with a slight bitter contrast. For an extra touch, sprinkle miniature chocolate chips or shavings as garnish. Refrigerate the assembled cups for at least 4 hours or even overnight to allow the flavors to develop and the layers to set firmly into a perfect bite-sized treat.
How to Serve Tiramisu Cookie Cups Recipe
Garnishes
Besides the traditional cocoa powder, garnishing with delicate chocolate shavings or mini chocolate chips adds a lovely decorative touch and extra chocolate hits with every bite. You could also try adding a small espresso bean or a dusting of cinnamon for an aromatic twist that complements the coffee flavors beautifully.
Side Dishes
These cookie cups shine as a standalone dessert but also pair wonderfully with lightly brewed coffee or a creamy cappuccino to amplify those coffee notes. Fresh berries or a raspberry coulis offer a refreshing tart counterpoint that balances the rich layers perfectly.
Creative Ways to Present
For a festive occasion, arrange your tiramisu cookie cups on a tiered dessert stand and top each with edible gold dust or a tiny chocolate curl for some flair. Use mini mason jars or clear plastic cups for individual servings to highlight the luscious layers visually, perfect for parties and gatherings.
Make Ahead and Storage
Storing Leftovers
Leftover tiramisu cookie cups can be stored covered in the refrigerator for up to three days. Keep them chilled to maintain the creamy layers’ texture and prevent the cookie base from becoming soggy, ensuring each cup tastes fresh when you dive back in.
Freezing
If you want to prepare these in advance, freeze the finished cups in an airtight container for up to one month. Thaw them overnight in the fridge before serving to retain their delightful consistency and flavor balance.
Reheating
Because these are best served cold, reheating is not recommended. Instead, allow them to thaw naturally and enjoy the creamy chill that makes tiramisu so irresistible. If you prefer a softer cookie base, let the cups rest slightly at room temperature after removing from the fridge.
FAQs
Can I make this Tiramisu Cookie Cups Recipe without coffee liqueur?
Absolutely! The coffee liqueur adds a nice boozy depth but is completely optional. You can omit it, and the espresso alone will give you that authentic coffee flavor that brings the dessert to life.
What if I don’t have mascarpone cheese?
Mascarpone is key for traditional tiramisu creaminess, but you can substitute with a blend of cream cheese and heavy cream whipped together. Keep in mind the flavor will be slightly tangier but still delicious.
How long does it take to set before serving?
For the best texture and flavor melding, refrigerate the assembled tiramisu cookie cups for at least 4 hours, though overnight is ideal to achieve perfectly set layers.
Can I use regular brewed coffee instead of espresso?
Strong brewed coffee can work in a pinch, but espresso provides a richer, more concentrated coffee taste that is signature to tiramisu’s flavor profile.
Are these cups suitable for freezing and storing long term?
Yes, they freeze well for up to a month. Just be sure to thaw them slowly in the fridge to preserve the textures and avoid condensation on the cocoa powder topping.
Final Thoughts
This Tiramisu Cookie Cups Recipe is one of those special desserts that never fails to impress friends and family. It’s fun to make, delightfully layered, and totally indulgent while capturing all the classic tiramisu charm in a grab-and-go format. Whether it’s a casual get-together or a special treat for yourself, these cookie cups will quickly become a favorite go-to dessert you’ll want to make again and again.
PrintTiramisu Cookie Cups Recipe

These Tiramisu Cookie Cups offer a delightful twist on the classic Italian dessert, combining a crunchy chocolate cookie base with a luscious coffee-chocolate layer and a creamy mascarpone topping. Perfectly portioned in cupcake liners, they are easy to make, visually appealing, and deliver the luscious flavors of tiramisu in every bite.
- Prep Time: 25 minutes
- Cook Time: 15 minutes
- Total Time: 4 hours 40 minutes (including chilling time)
- Yield: 12 cups 1x
- Category: Dessert
- Method: Baking and no-bake layering
- Cuisine: Italian
- Diet: Vegetarian
Ingredients
For the Cookie Base:
- 1 ½ cups crushed chocolate cookies (such as Oreos)
- 4 tbsp unsalted butter, melted
For the Coffee-Chocolate Layer:
- ⅓ cup strong brewed espresso, cooled
- 1 tbsp coffee liqueur (optional)
- ⅓ cup semi-sweet chocolate chips
- 2 tbsp unsalted butter
- ½ cup heavy cream
- 1 tbsp cornstarch
For the Mascarpone Cream Layer:
- 1 cup mascarpone cheese, room temperature
- ½ cup heavy cream, cold
- ⅓ cup powdered sugar
- 1 tsp vanilla extract
For the Topping:
- Unsweetened cocoa powder
- Optional: chocolate shavings or mini chocolate chips
Instructions
- Make the Cookie Base: Preheat the oven to 350°F (175°C) and line a muffin tin with cupcake liners. Combine the crushed chocolate cookies and melted butter in a bowl, mixing until the texture resembles wet sand. Press the mixture firmly into the bottom of each liner to create a compact base. Bake for 5 minutes, then allow to cool completely.
- Prepare the Coffee-Chocolate Layer: In a small saucepan, combine the cooled espresso, coffee liqueur (if using), semi-sweet chocolate chips, and butter. Melt over low heat, stirring until smooth. In a separate bowl, whisk together the heavy cream and cornstarch until fully combined and lump-free. Gradually add this cream mixture to the saucepan, stirring constantly over medium heat until it thickens to a pudding-like consistency. Remove from heat and allow to cool to room temperature.
- Whip the Mascarpone Cream: In a mixing bowl, beat the mascarpone cheese, powdered sugar, and vanilla extract until smooth and creamy. In another bowl, whip the cold heavy cream until stiff peaks form. Gently fold the whipped cream into the mascarpone mixture until fully combined and airy.
- Assemble the Tiramisu Cups: Begin layering the dessert by spooning 1-2 tablespoons of either the mascarpone cream or coffee-chocolate mixture onto the cooled cookie base. Smooth the layer evenly, then add an alternate layer of the opposite filling. Repeat layering until the cupcake liners are nearly full, chilling the cups for 10 minutes between layers to maintain structure and distinct layers.
- Finish with Cocoa Powder and Garnish: Sift a generous amount of unsweetened cocoa powder over the top of each cup. Optionally, sprinkle chocolate shavings or mini chocolate chips for extra texture and decoration. Refrigerate the assembled cups for at least 4 hours, preferably overnight, allowing the layers to set and the flavors to meld beautifully.
Notes
- Use freshly brewed espresso for the best coffee flavor, or strong brewed coffee as an alternative.
- The coffee liqueur is optional but enhances the authentic tiramisu taste.
- Make sure the mascarpone cheese is at room temperature to avoid lumps during mixing.
- Be gentle while folding the whipped cream to keep the mixture light and airy.
- For a gluten-free version, substitute the crushed cookies with gluten-free chocolate cookies.
- Chilling between layers helps keep the layers distinct and prevents them from mixing.
- Store the tiramisu cups in the refrigerator and consume within 2-3 days for best freshness.
Nutrition
- Serving Size: 1 cup (approx. 100g)
- Calories: 320 kcal
- Sugar: 20 g
- Sodium: 110 mg
- Fat: 22 g
- Saturated Fat: 13 g
- Unsaturated Fat: 7 g
- Trans Fat: 0 g
- Carbohydrates: 24 g
- Fiber: 1.5 g
- Protein: 4 g
- Cholesterol: 65 mg
Keywords: Tiramisu, Cookie Cups, Italian Dessert, Coffee Dessert, Mascarpone, No-Bake Dessert, Chocolate, Espresso