
Oreo Dump Cake Recipe
If you have a sweet tooth and love hassle-free desserts, this Oreo Dump Cake Recipe is your new best friend. Combining the rich, familiar flavors of Oreo cookies with the comforting texture of cake and the creamy sweetness of cool whip and condensed milk, this dessert comes together in a snap. It’s the perfect crowd-pleaser for any occasion, delivering layers of chocolatey goodness without fuss or fancy steps. Once you try this Oreo Dump Cake Recipe, you’ll wonder why you ever spent hours baking a complicated dessert again!
Ingredients You’ll Need
Every ingredient in this Oreo Dump Cake Recipe plays a crucial role in making the final dish irresistible. From the crunchy Oreos to the luscious sweetened condensed milk and the fluffy cool whip, each adds a unique texture and flavor dimension. Having these simple yet essential ingredients on hand means you can whip up this dessert anytime, even on short notice.
- 20 – 28 Oreo cookies, divided: These add the signature chocolate crunch and creamy center that define the cake.
- 14 oz. sweetened condensed milk: Provides a rich, velvety sweetness that infuses the cake as it bakes.
- 8 oz. cool whip, thawed: Brings a light, airy texture that balances the density of the cake mix and cookies.
- 15.25 oz. chocolate fudge cake mix: The base that gives the dessert structure and a deep chocolate flavor.
- ½ cup (113 g) cold butter, evenly sliced: Adds moisture and richness, creating a beautiful golden crust on top.
- ¼ – ½ cup (57 – 113 g) melted butter: Helps the cake mix bake to perfection and enhances the buttery flavor.
How to Make Oreo Dump Cake Recipe
Step 1: Prep Your Oven and Pan
Start by preheating your oven to 350 F (177 C). It’s always best to get the oven hot and ready so the cake bakes evenly. Lightly grease an 11 x 7 or 9 x 13 inch baking dish with a tablespoon of butter—this will keep your cake from sticking and help with easy serving later on.
Step 2: Layer the Oreos
Begin by evenly spreading 18 to 22 chocolate Oreo cookies across the bottom of your prepared pan. Depending on the shape and size of your pan, adjust the number so the cookies form a single, sturdy base. This Oreo layer is going to provide that wonderful chocolate crunch in every bite.
Step 3: Add the Sweetened Condensed Milk
Pour the 14 ounces of sweetened condensed milk evenly over the Oreo cookies. This step is crucial because as the cake bakes, the condensed milk bubbles up and caramelizes slightly, soaking the Oreos and infusing the entire base with luxurious sweetness.
Step 4: Spread the Cool Whip
Next, spread the thawed 8 ounces of cool whip over the sweetened condensed milk layer. This airy topping contrasts perfectly with the dense cookie base and chocolate cake mix, adding lightness to the dessert.
Step 5: Sprinkle the Cake Mix
Now evenly sprinkle the entire package of chocolate fudge cake mix on top of the cool whip. This dry layer will bake into a tender, crumbly cake that locks in all the flavors below and creates the iconic “dump cake” texture.
Step 6: Add the Butters and More Oreos
Lay slices of the cold butter on top of the dry cake mix, trying to cover as much surface as possible. Then drizzle the melted butter on top, which will help the cake mix bake up crispy and golden. Finally, top the whole dessert with 4 to 6 crushed Oreo cookies for an extra boost of crunch and Oreo flavor.
Step 7: Bake and Cool
Bake your cake in the oven for 35 to 40 minutes. You’ll know it’s done when the edges are bubbling and the smell of caramelized sweetened condensed milk fills your kitchen. Let the cake cool for 5 minutes before serving—it’s easier to scoop and the flavors have time to marry.
How to Serve Oreo Dump Cake Recipe
Garnishes
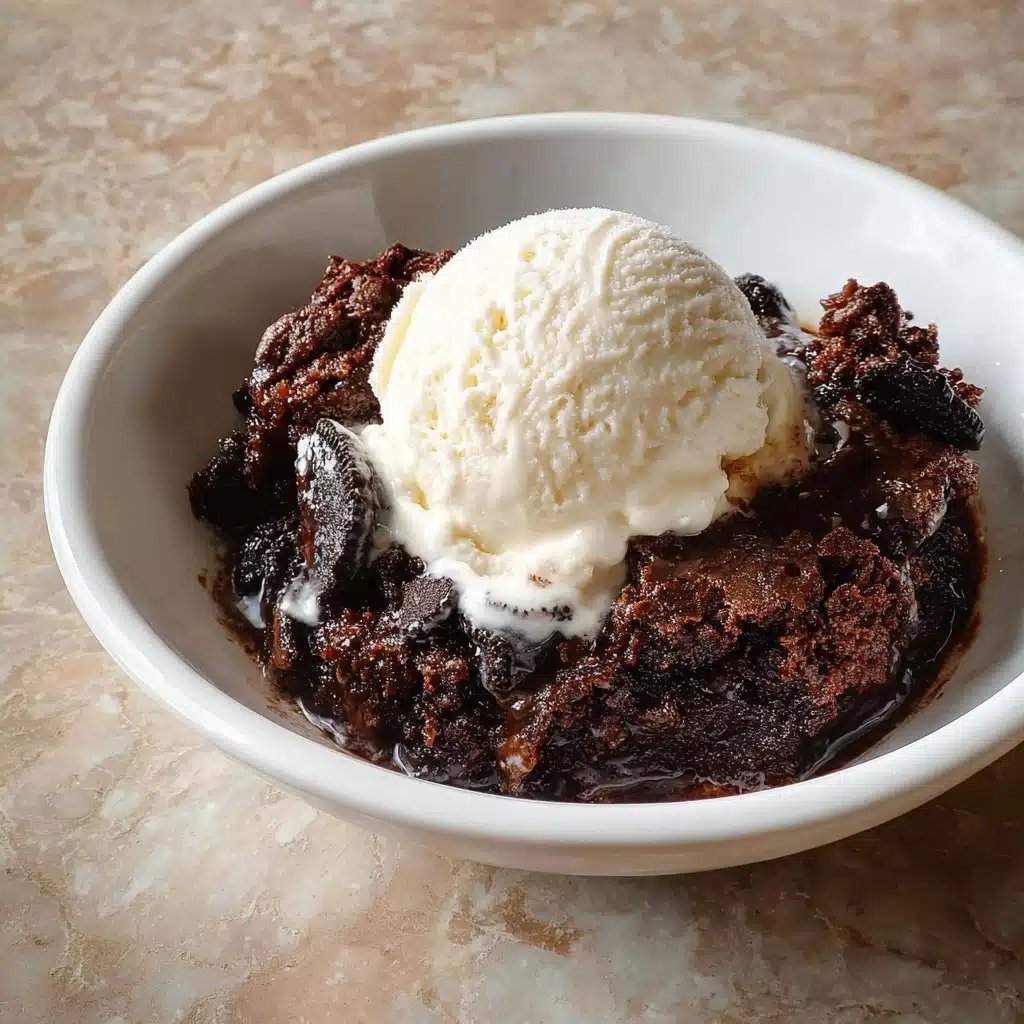
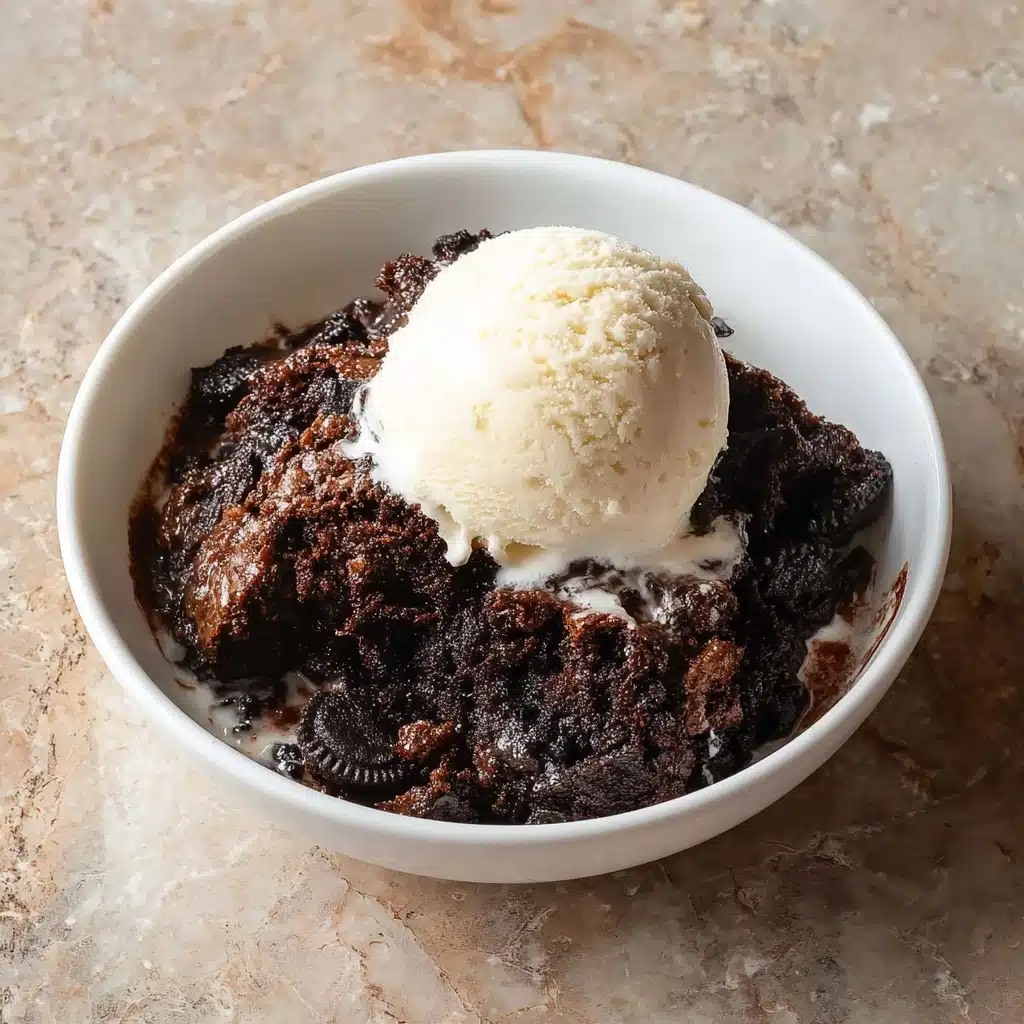
This cake tastes amazing on its own, but if you want to take presentation and flavor to the next level, try topping each serving with a scoop of vanilla ice cream or a dollop of whipped cream. Fresh mint leaves or a drizzle of chocolate syrup also add a visually appealing touch and a pop of fresh or extra chocolatey flavor.
Side Dishes
Serve this dessert alongside a fruity salad or fresh berries to balance its sweetness and add brightness to the plate. A hot cup of coffee or a cold glass of milk pairs perfectly, making each bite feel even more indulgent and satisfying.
Creative Ways to Present
For parties, consider making individual Oreo Dump Cake portions in mason jars. Layer the dessert exactly as directed, bake in wide-mouth jars, and serve with spoons for a charming, portable treat. You can also assemble the dessert in a clear glass dish to show off the beautiful layers—this always wows guests and invites eager hands to dig in.
Make Ahead and Storage
Storing Leftovers
If you have leftovers, cover the dish tightly with plastic wrap or transfer portions to an airtight container. Refrigerate and enjoy within 3 to 4 days. This cake holds its flavor well and actually tastes better after sitting so the flavors meld.
Freezing
You can freeze the Oreo Dump Cake Recipe for up to 2 months. Wrap the cooled cake tightly in foil and place it in a freezer-safe container. When ready to eat, thaw overnight in the fridge and warm slightly in the oven or microwave before serving.
Reheating
To bring your leftover Oreo Dump Cake back to life, warm individual portions in the microwave for 20-30 seconds or place the entire dish in a 325 F oven for about 15 minutes. The goal is to heat the cake through without drying it out, keeping it moist and delicious.
FAQs
Can I use double stuffed Oreos in this recipe?
Absolutely! Double stuffed Oreos will add even more creaminess to the cake’s base layer, making it extra decadent without compromising texture or structure.
Is it necessary to use the cool whip, or can I substitute something else?
Cool whip adds lightness and helps balance the richness of the condensed milk and butter. You can substitute with homemade whipped cream or mascarpone for a different but equally tasty result.
Can I make this dessert gluten-free?
To make this Oreo Dump Cake Recipe gluten-free, look for gluten-free Oreo cookies and a gluten-free chocolate cake mix. The rest of the ingredients are naturally gluten-free.
Do I need to refrigerate this dessert after baking?
It’s best to refrigerate leftovers to maintain freshness and prevent the dairy ingredients from spoiling. However, the cake can sit comfortably at room temperature for a few hours while serving.
Can I add nuts or other mix-ins to the cake mix?
Yes! Adding chopped nuts, chocolate chips, or even mini marshmallows can boost texture and flavor. Just sprinkle them in with the cake mix before baking for a delightful twist.
Final Thoughts
This Oreo Dump Cake Recipe truly makes dessert time effortless and memorable. From the simple prep to the deliciously layered textures and flavors, it’s a no-brainer for any occasion. Once you make it, you’ll love keeping this recipe in your back pocket for those moments when you want to wow friends and family without the fuss. Go ahead and give it a try—you’re about to bake your new favorite dessert!
PrintOreo Dump Cake Recipe

This Oreo Dump Cake is a quick and indulgent dessert that layers chocolate Oreos, sweetened condensed milk, Cool Whip, and chocolate fudge cake mix, topped with butter and baked to gooey, caramelized perfection. Perfect for those who want a rich, chocolaty treat with minimal effort.
- Prep Time: 10 minutes
- Cook Time: 35-40 minutes
- Total Time: 45-50 minutes
- Yield: 12 servings 1x
- Category: Dessert
- Method: Baking
- Cuisine: American
- Diet: Vegetarian
Ingredients
Cookies
- 20 – 28 Oreo cookies, divided
Wet Ingredients
- 14 oz. sweetened condensed milk
- 8 oz. Cool Whip, thawed
- ¼ – ½ cup (57 – 113 g) butter, melted
Dry Ingredients
- 15.25 oz. chocolate fudge cake mix
Other
- ½ cup (113 g) cold butter, evenly sliced
Instructions
- Preheat and Grease: Preheat your oven to 350°F (177°C). Lightly grease an 11 x 7 or 9 x 13 inch baking dish with a tablespoon of butter to prevent sticking.
- Layer Oreos: Evenly spread 18 to 22 chocolate Oreo cookies across the bottom of the prepared baking dish. The exact number depends on your pan size.
- Add Sweetened Condensed Milk: Pour the entire 14 oz. can of sweetened condensed milk evenly over the Oreo layer, ensuring full coverage.
- Spread Cool Whip: Spread the thawed 8 oz. Cool Whip evenly over the sweetened condensed milk and Oreo layer, creating a smooth layer.
- Sprinkle Cake Mix: Evenly sprinkle the entire 15.25 oz. chocolate fudge cake mix over the Cool Whip layer.
- Top with Butter: Place slices of the cold ½ cup butter over the dry cake mix layer, covering as much of the surface as possible. Then drizzle the melted butter (¼ to ½ cup) evenly in between the slices.
- Add Crushed Oreos: Finish by sprinkling 4 to 6 crushed Oreo cookies over the entire dessert for added texture and crunch.
- Bake: Bake in the preheated oven for 35 to 40 minutes until the sweetened condensed milk bubbles around the edges and the top looks lightly caramelized.
- Cool and Serve: Allow the cake to cool for 5 minutes before serving. Scoop portions into bowls and optionally top with ice cream for extra indulgence. Enjoy your easy Oreo dump cake!
Notes
- Using cold butter slices helps create that signature gooey topping.
- The cake is best enjoyed warm, but can be reheated for leftovers.
- Feel free to add ice cream or whipped cream when serving for extra richness.
- Adjust the number of Oreos based on your baking dish size for the perfect layer.
- This recipe is simple, requiring no mixing bowl—just layer and bake.
Nutrition
- Serving Size: 1 slice (approx. 1/12 of cake)
- Calories: 380 kcal
- Sugar: 35 g
- Sodium: 270 mg
- Fat: 18 g
- Saturated Fat: 10 g
- Unsaturated Fat: 6 g
- Trans Fat: 0.5 g
- Carbohydrates: 50 g
- Fiber: 2 g
- Protein: 4 g
- Cholesterol: 35 mg
Keywords: Oreo dump cake, easy Oreo dessert, no-mix cake, layered chocolate cake, simple dump cake recipe