Chocolate Chip Dessert Pizza Recipe
Introduction
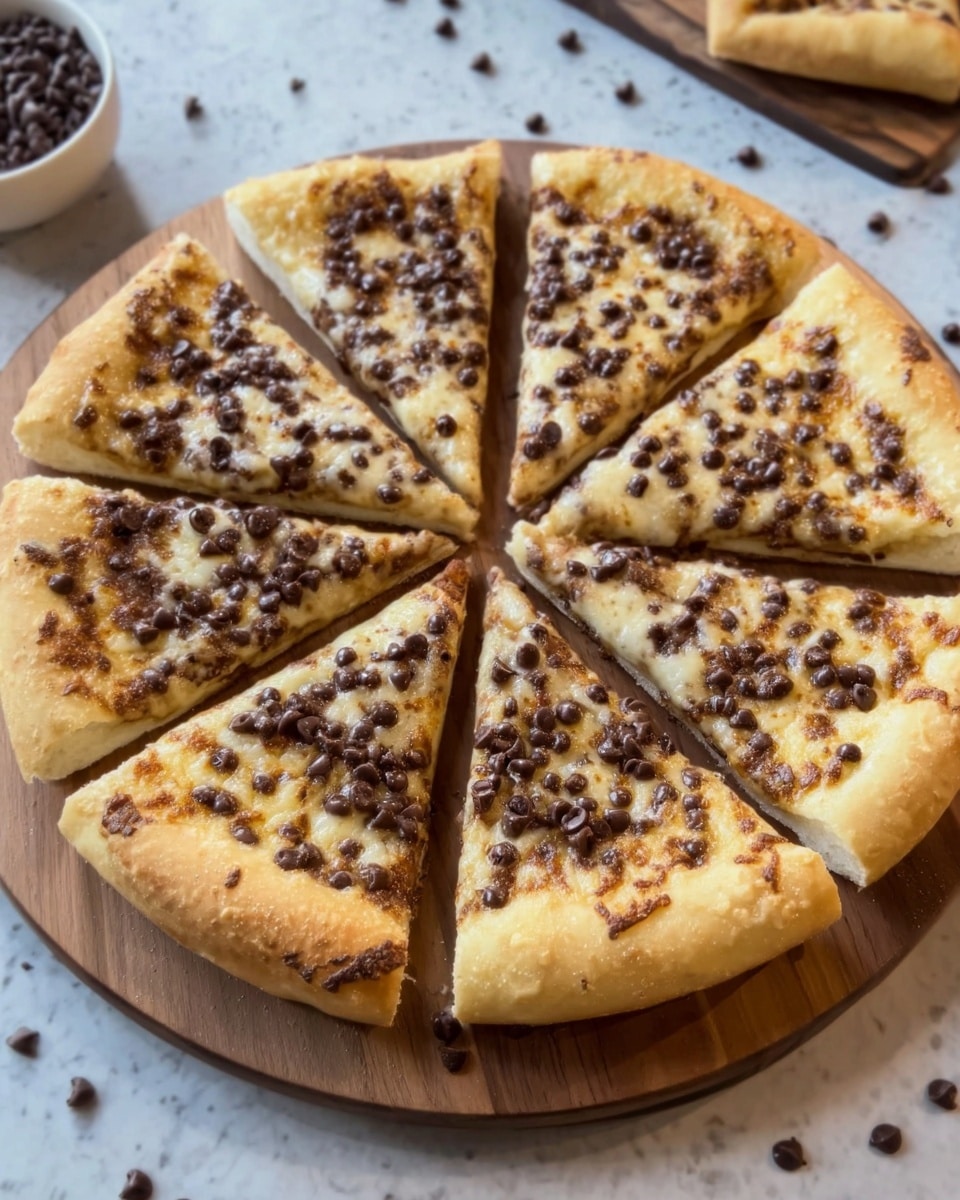
This Chocolate Chip Dessert Pizza is a delightful twist on your favorite sweet treats, combining a crispy crust with a rich, cake-mix topping and melty chocolate chips. It’s quick to prepare and perfect for sharing at any gathering or enjoying as a satisfying dessert.
Ingredients
- 1 pizza crust (store-bought or homemade)
- 1 ½ cups yellow cake mix
- ½ cup melted butter
- ½ cup milk chocolate chips
- ¼ cup granulated sugar
- ¼ cup brown sugar
Instructions
- Step 1: Preheat your oven to 400°F (200°C).
- Step 2: Roll out the pizza crust onto a pizza pan and use a fork to poke holes evenly across the surface. Bake it for 5 minutes to prevent sogginess.
- Step 3: In a bowl, combine the melted butter with the yellow cake mix until you get a smooth, spreadable mixture.
- Step 4: In a separate bowl, mix together the granulated sugar and brown sugar.
- Step 5: Spread the cake mix and butter mixture evenly over the pre-baked pizza crust.
- Step 6: Sprinkle the milk chocolate chips evenly over the top, pressing them gently into the topping.
- Step 7: Evenly sprinkle the sugar mixture over the pizza, avoiding the edges to prevent burning.
- Step 8: Bake the dessert pizza for 10 to 12 minutes, or until the topping turns golden brown and bubbly.
Tips & Variations
- For extra flavor, add a teaspoon of vanilla extract to the cake mix and butter mixture before spreading.
- Try using white chocolate chips or peanut butter chips instead of milk chocolate for a tasty variation.
- If you prefer a gluten-free option, use a gluten-free pizza crust or make your own gluten-free dough at home.
Storage
Store any leftovers in an airtight container at room temperature for up to 2 days. To keep the dessert pizza fresh, avoid refrigerating as it can dry out the crust. Reheat slices briefly in a warm oven or toaster oven to restore crispiness.
How to Serve
Serve this delicious recipe with your favorite sides.
FAQs
Can I make this dessert pizza ahead of time?
You can prepare the crust and topping mixture in advance, but it’s best to bake it just before serving to maintain a crisp crust and fresh flavors.
Can I use a different cake mix flavor?
Yes! Vanilla or white cake mix works well, and experimenting with flavors like funfetti can add a playful twist to this dessert pizza.
PrintChocolate Chip Dessert Pizza Recipe

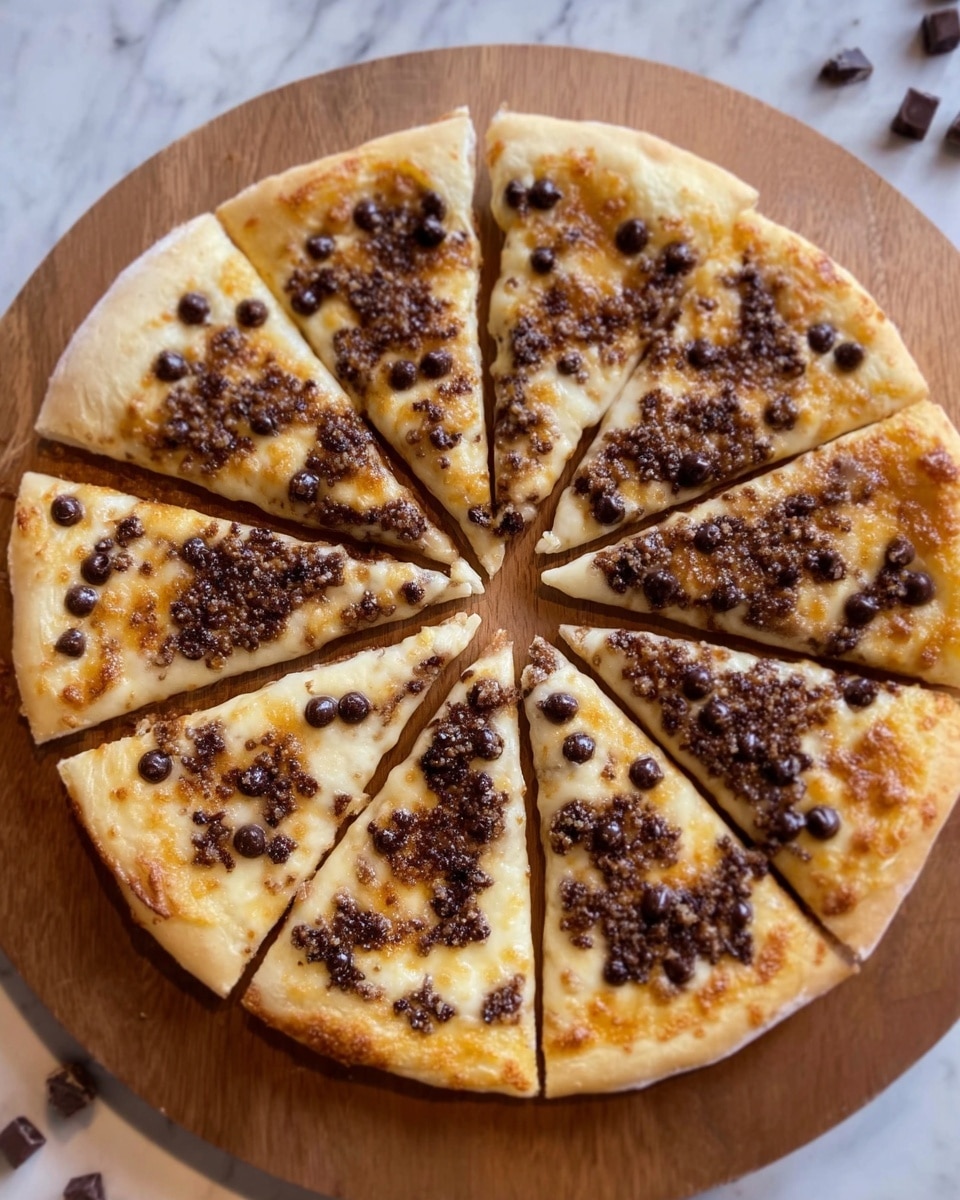
This Chocolate Chip Dessert Pizza is a delightful twist on traditional pizza, featuring a sweet cookie-like crust topped with a buttery cake mix layer, sprinkled with a mix of granulated and brown sugars, and studded with rich milk chocolate chips. Baked to golden perfection, this dessert is perfect for sharing or indulging in a sweet treat.
- Prep Time: 10 minutes
- Cook Time: 17 minutes
- Total Time: 27 minutes
- Yield: 8 servings 1x
- Category: Dessert
- Method: Baking
- Cuisine: American
Ingredients
Crust
- 1 pizza crust (store-bought or homemade)
Filling
- 1 ½ cups yellow cake mix
- ½ cup melted butter
Toppings
- ½ cup milk chocolate chips
- ¼ cup granulated sugar
- ¼ cup brown sugar
Instructions
- Preheat Oven: Preheat your oven to 400°F (200°C) to prepare for baking the dessert pizza.
- Prepare Crust: Roll out the pizza crust onto a pizza pan and use a fork to poke holes evenly across the crust. This helps prevent bubbling during baking. Bake the crust for 5 minutes to partially cook it.
- Mix Cake Layer: In a bowl, combine the melted butter and yellow cake mix, stirring until you achieve a smooth, consistent batter-like texture.
- Mix Sugars: In a separate bowl, mix the granulated sugar and brown sugar together to create a sweet topping blend.
- Assemble Pizza: Spread the cake mix and butter mixture evenly over the pre-baked pizza crust, covering the entire surface except the edges.
- Add Chocolate Chips: Sprinkle the milk chocolate chips evenly on top of the cake mixture, then gently press them into the surface to help them stay in place during baking.
- Sprinkle Sugar Mixture: Evenly sprinkle the mixed sugars over the top of the dessert pizza, avoiding the crust edges to prevent burning.
- Bake to Finish: Bake the assembled dessert pizza in the oven for 10-12 minutes, until the topping is golden brown and cooked through. Remove from oven and allow to cool slightly before serving.
Notes
- You can use either store-bought or homemade pizza dough depending on your preference and time availability.
- For a crispier crust, make sure to pre-bake the dough adequately before adding the toppings.
- Feel free to substitute milk chocolate chips with dark or white chocolate chips based on taste.
- To add extra texture, consider sprinkling chopped nuts or shredded coconut before baking.
- Serve warm with a scoop of vanilla ice cream for an indulgent dessert experience.
Keywords: Chocolate Chip Dessert Pizza, Sweet Pizza, Dessert Pizza, Cake Mix Pizza, Chocolate Chip Treat