s A Delicious Twist on a Classic Dessert Recipe
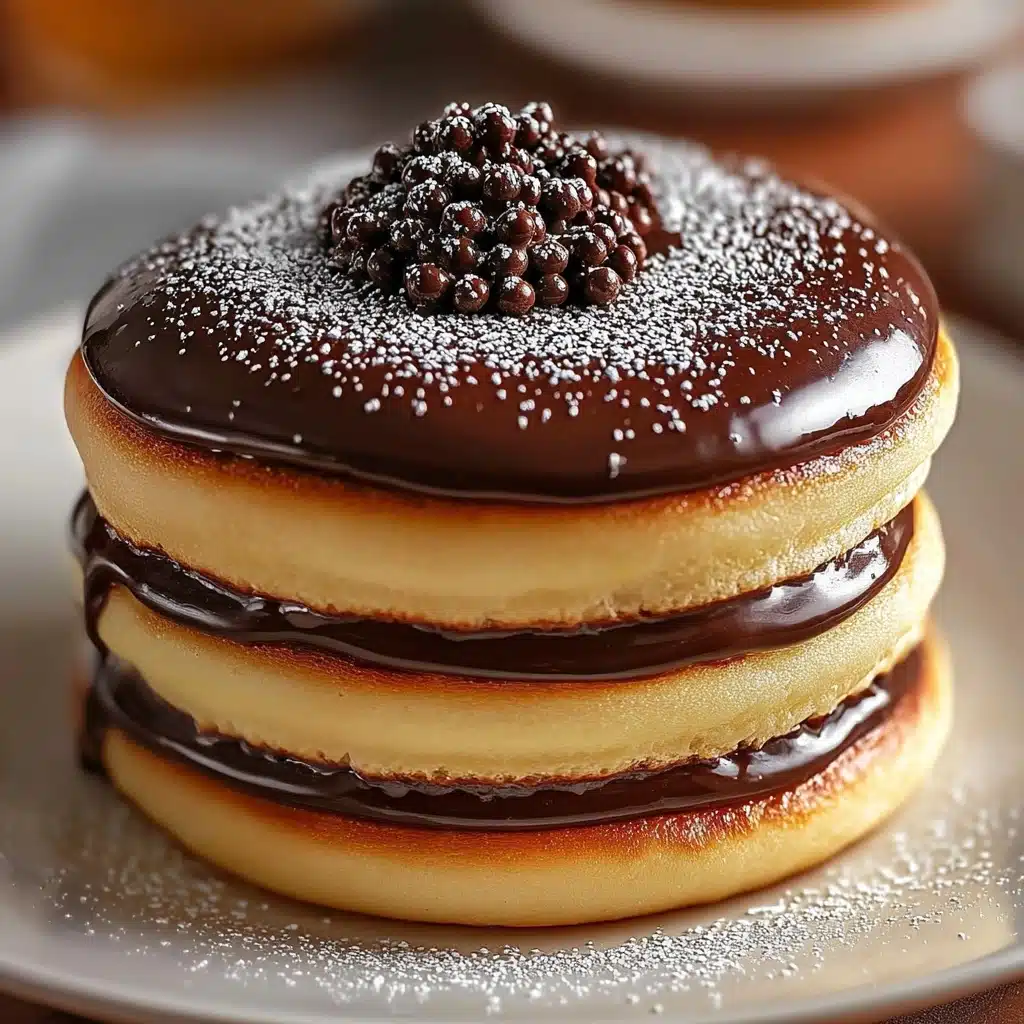
Get ready to fall in love with Boston Cream Pie Cookies s A Delicious Twist on a Classic Dessert that brings the nostalgic flavors of the iconic cake into an irresistible handheld treat. These cookies perfectly balance a soft, buttery base with fluffy vanilla cream filling and a decadent chocolate glaze, creating layers of texture and taste that will make your taste buds dance. Whether you’re baking for family, friends, or just treating yourself, this recipe adds a fun and delightful spin to a beloved dessert everyone knows and loves.
Ingredients You’ll Need
Gathering simple yet essential ingredients is the first step to making this delicious treat shine. Each item contributes to the overall magic of the Boston Cream Pie Cookies, delivering creamy, tender, and richly flavored results.
- 1 cup unsalted butter, softened: Provides a rich, creamy base and tender crumb in the cookie dough.
- 1 cup granulated sugar: Adds sweetness and helps with the cookie’s light texture.
- 2 large eggs: Bind the ingredients together and give structure to the dough.
- 1 teaspoon vanilla extract: Boosts the warm, inviting flavor throughout the dough and cream.
- 2 cups all-purpose flour: Creates the foundation of the cookie’s structure and texture.
- 1 teaspoon baking powder: Helps the cookies rise just enough for a soft bite.
- 1/2 teaspoon baking soda: Works with baking powder to ensure perfect tenderness.
- 1/4 teaspoon salt: Balances sweetness and enhances flavor depth.
- 1 cup heavy cream: Whipped into a fluffy vanilla filling that’s rich and silky.
- 1/2 cup powdered sugar: Sweetens the whipped cream without graininess.
- 1 teaspoon vanilla extract (for cream filling): Adds lovely vanilla notes to the whipped cream filling.
- 1 cup semi-sweet chocolate chips: Melted to create a glossy, decadent glaze on top.
- 1 tablespoon vegetable oil: Blends into the chocolate for a smooth, shiny coating.
How to Make s A Delicious Twist on a Classic Dessert
Step 1: Cream the Butter and Sugar
Start by beating the softened butter and granulated sugar together until you get a light, fluffy mixture. This step sets the stage for tender cookies by incorporating air and blending sweetness evenly into the dough.
Step 2: Add Eggs and Vanilla
Next, beat in the eggs one at a time, ensuring each is well combined. Follow with the vanilla extract to infuse that classic, comforting flavor that ties this entire dessert together.
Step 3: Combine Dry Ingredients
Whisk the all-purpose flour, baking powder, baking soda, and salt in a separate bowl. Gradually mix these dry ingredients into the wet mixture on low speed, careful not to overmix, which keeps the cookie texture delightfully tender.
Step 4: Chill the Dough
Cover your dough and chill in the refrigerator for at least 30 minutes. This rest time helps prevent spreading and makes the dough easier to handle when scooping.
Step 5: Whip the Cream Filling
In a clean bowl, whisk together heavy cream, powdered sugar, and vanilla extract with a mixer until stiff peaks form. This silky, fluffy filling is what makes these cookies s A Delicious Twist on a Classic Dessert, capturing the iconic creaminess you crave.
Step 6: Bake the Cookies
Preheat your oven to 350°F (175°C) and line baking sheets with parchment paper. Drop rounded spoonfuls of chilled dough spaced apart and bake for about 10-12 minutes until the edges are gently golden. The centers may look slightly soft, but they’ll firm up as they cool.
Step 7: Melt the Chocolate Glaze
While the cookies cool, melt the chocolate chips with vegetable oil in the microwave in short bursts, stirring often. The oil gives the glaze a smooth, glossy finish that’s perfect for dipping or drizzling.
Step 8: Assemble the Sandwiches
Once cookies are cool, spread or dollop a generous amount of the whipped cream filling onto one cookie’s flat side and sandwich it with another cookie, pressing gently to spread the cream evenly.
Step 9: Glaze the Cookies
Dip or drizzle the chocolate glaze over your sandwich cookies and let them set on a wire rack. This sweet chocolate coating completes the look and taste of these genius Boston Cream Pie Cookies s A Delicious Twist on a Classic Dessert.
How to Serve s A Delicious Twist on a Classic Dessert

Garnishes
A light dusting of powdered sugar or a few colorful sprinkles can add a charming festive touch. Fresh berries placed around the serving plate complement the rich cream and chocolate perfectly, adding a pop of color and freshness.
Side Dishes
Serve these indulgent cookies alongside a simple cup of coffee or a steaming mug of hot tea to balance their richness. For a more decadent spread, pair with vanilla ice cream or fresh fruit salad to lighten the experience.
Creative Ways to Present
Wrap each cookie sandwich individually in wax paper tied with a ribbon for lovely party favors or gifts. Arrange them on tiered dessert stands to impress guests, or plate on rustic wooden boards with a scattering of chocolate curls or edible flowers for eye-catching presentation.
Make Ahead and Storage
Storing Leftovers
Keep any leftover Boston Cream Pie Cookies in an airtight container in the refrigerator to maintain the freshness of the cream filling and keep the cookies from becoming too soft. They’ll be delicious for up to 3 days.
Freezing
You can freeze the cookies unassembled—just freeze the baked cookies and the whipped cream filling separately. Assemble after thawing for best texture. Freeze cookies in a sealed container or bag for up to one month.
Reheating
Since these cookies are best served chilled or at room temperature, avoid microwaving them. If you prefer the chocolate soften slightly, let the cookies sit at room temperature for 10-15 minutes before enjoying.
FAQs
Can I use regular cream instead of heavy cream for the filling?
Heavy cream is ideal because it whips up thick and holds its shape, which is crucial for the filling’s texture. Regular cream is too thin and won’t whip properly, so it’s best to stick with heavy cream.
What is the best way to prevent the cookies from spreading too much?
Chilling the dough for at least 30 minutes before baking is key. Also, using parchment paper and spacing the dough balls sufficiently helps keep the cookies from merging into one large cookie.
Can I substitute the chocolate chips with dark chocolate or milk chocolate?
Absolutely! Dark chocolate will lend a richer, slightly bitter contrast, while milk chocolate adds extra sweetness. Choose based on your preference, but keep the oil to preserve the shiny glaze.
Is it possible to make these cookies gluten-free?
You can try substituting the all-purpose flour with a gluten-free flour blend that measures cup-for-cup. Make sure it contains xanthan gum for structure, but expect some slight changes in texture.
How long do these cookies keep their best texture?
For optimal freshness, consume within 2-3 days when refrigerated. The cream filling tastes best fresh, and the cookie texture remains soft and tender during this time frame.
Final Thoughts
These Boston Cream Pie Cookies s A Delicious Twist on a Classic Dessert bring all the joy of a traditional treat in a fun, snackable form. I encourage you to give this recipe a try because once you take that first bite, you’ll understand why it’s such a beloved twist—rich, creamy, chocolatey, and utterly unforgettable. Happy baking, and even happier eating!
Prints A Delicious Twist on a Classic Dessert Recipe

Boston Cream Pie Cookies are a delightful twist on the classic Boston Cream Pie dessert, featuring soft, buttery cookies sandwiched with a luscious whipped cream filling and topped with a rich chocolate glaze. These cookies combine the nostalgic flavors of vanilla, cream, and chocolate into a convenient, bite-sized treat perfect for any occasion.
- Prep Time: 45 minutes
- Cook Time: 12 minutes
- Total Time: 1 hour
- Yield: 24 cookies (12 sandwich cookies) 1x
- Category: Dessert, Cookies
- Method: Baking, Whipping, Dipping
- Cuisine: American
- Diet: Vegetarian
Ingredients
Cookie Dough
- 1 cup unsalted butter, softened
- 1 cup granulated sugar
- 2 large eggs
- 1 teaspoon vanilla extract
- 2 cups all-purpose flour
- 1 teaspoon baking powder
- 1/2 teaspoon baking soda
- 1/4 teaspoon salt
Cream Filling
- 1 cup heavy cream
- 1/2 cup powdered sugar
- 1 teaspoon vanilla extract
Chocolate Glaze
- 1 cup semi-sweet chocolate chips
- 1 tablespoon vegetable oil
Instructions
- Cream Butter and Sugar: In a large mixing bowl, cream together the softened butter and granulated sugar using an electric mixer on medium speed. Beat until the mixture is light and fluffy, about 3-4 minutes.
- Add Eggs and Vanilla: Add the eggs, one at a time, mixing well after each addition. Stir in the vanilla extract until fully combined.
- Combine Dry Ingredients: In a separate bowl, whisk together the all-purpose flour, baking powder, baking soda, and salt. Gradually add this dry mixture to the wet ingredients, mixing on low speed until just combined. Avoid overmixing to keep the cookies tender.
- Chill Dough: Cover the bowl with plastic wrap and refrigerate the dough for at least 30 minutes. This helps the dough firm up, making it easier to scoop and bake evenly.
- Prepare Cream Filling: In a medium bowl, pour the heavy cream and add the powdered sugar and vanilla extract. Using a hand mixer, whip the cream until stiff peaks form, about 3-5 minutes. Be careful not to overwhip to avoid curdling.
- Keep Filling Cool: Set the whipped cream filling aside in the refrigerator to keep it cool and firm until assembly.
- Preheat Oven: Preheat your oven to 350°F (175°C) and line two baking sheets with parchment paper to prevent sticking.
- Scoop Cookies: Use a cookie scoop or tablespoon to drop rounded balls of dough onto the prepared baking sheets, spacing them about 2 inches apart to allow spreading.
- Bake Cookies: Bake for 10-12 minutes, or until the edges turn lightly golden while the centers remain slightly soft for a tender texture.
- Cool Cookies: Allow the cookies to cool on the baking sheets for about 5 minutes before transferring them to a wire rack to cool completely.
- Melt Chocolate: In a microwave-safe bowl, combine the semi-sweet chocolate chips and vegetable oil. Microwave in 30-second intervals, stirring in between, until melted and smooth, about 1-2 minutes total.
- Cool Chocolate: Let the melted chocolate cool slightly so it thickens a bit but is still spreadable for glazing.
- Assemble Cookies: Take one cookie and place a generous dollop of the whipped cream filling on the flat side.
- Sandwich Cookies: Top with another cookie, flat side down, to create a sandwich. Gently press down to evenly spread the filling to the edges.
- Repeat Assembly: Repeat with the remaining cookies and cream filling until all cookies are assembled.
- Glaze Cookies: Drizzle or dip the assembled cookie sandwiches in the melted chocolate glaze, allowing any excess to drip off for a neat finish.
- Set Glaze: Place the glazed cookies on a wire rack to let the chocolate set completely before serving.
Notes
- For best results, use room temperature butter to help achieve a fluffy dough texture.
- Chilling the dough before baking is crucial to prevent excessive spreading and to improve cookie texture.
- Use a hand mixer for better control when whipping the cream to stiff peaks.
- Make sure the chocolate glaze is slightly cooled before dipping to avoid melting the cream filling.
- Store assembled cookies in an airtight container in the refrigerator and consume within 3 days for optimal freshness.
- These cookies can also be frozen before assembly; freeze baked cookies and thaw before filling and glazing.
Nutrition
- Serving Size: 1 sandwich cookie (2 cookies with filling and chocolate glaze)
- Calories: 250 kcal
- Sugar: 19 g
- Sodium: 120 mg
- Fat: 15 g
- Saturated Fat: 8 g
- Unsaturated Fat: 5 g
- Trans Fat: 0 g
- Carbohydrates: 28 g
- Fiber: 1 g
- Protein: 3 g
- Cholesterol: 55 mg
Keywords: Boston Cream Pie Cookies, cream filled cookies, chocolate glazed cookies, sandwich cookies, whipped cream filling, classic dessert twist